Thursday, August 12, 2010

I'm not dead...I swear!


A long awaited return to the blogging world is almost upon us lovely ladies (and some gents I hope) of the The Classy, Coy and Curious Girls Guide to Make Up.

My lap top I was also using has busted so I have been saving for a brand new MAC lap top! I will be making that very exciting (and pricey) purchase very soon so stay tuned!

Over the past few months I have changed jobs, moved house, been sad, happy, inspired and UN-inspired. I have been working very hard in my new job and have settled in very nicely BUT it is time to get back to the blogging world with a BANG!

Over the weekend I have plans to do some interesting looks. I have been working on my Week Day Work looks and think that I have perfected the 5 minute eyeshadow glamorize.

I came up with this little idea when I first stepped into my new role at my new job. I have had to do my make up perfectly but very very quickly in the morning and also tone it down for the work place.

Over the next few weeks I will bring you 5 days of work place looks and also a step by step on how to get them done.

Well I will now leave you with a PROMISE that I will be back shortly with some new and exciting things to share and teach.

I'm so sorry I was away for so long but now I'M BACK and hoping to be better than ever!

Hope you all still will keep checking this blog and help me build this up to what I hope it will be in the future!

Wishing you all happy days, lots of kisses and laughter

Thanks for sticking by me, see you soon!

Love

Jenn
The Classy, Coy and Curious Girls Guide to Make Up
xxx

Thursday, May 6, 2010

The Last Day at Work Look

Hi Classy, Coy and Curious ones!

My god this is getting ridiculous isn't it?! I have a great reason as the why I have been so absent lately though. In the past month I have packed up house, moved house, got a new job, living out of boxes, been to a family members funeral, scattered my grandfather's ashes and to top it all off trying to write a book and get a spare second to write this blog!

Take a breath!

So today I am doing a very quick 5 minute eye. This I have called The Last Day at Work Look mainly because this is my last day at this job!

I don't have all my pictures with me of the make up I have used so I will do my best to explain.

Here we go!

Step One: Clean Face. As always clean and moisturized face.

Step Two: Base coat. Get yourself a neutral coloured eyeshadow. Take this right up to the brow bone. I have used a matte beige purple colour.

Step Three: The eye socket colour. I have used a reddy brown from my MAC cream eyeshadow palete. Coat the eye socket and make sure to blend the colour in well. Do this by using a good quality eyeshadow brush and simply go over and over the eye socket gently until you are happy with the colour.

Step Four: The crease colour. I have used a purple/red colour from my Maybelline berry compact. Just be carful of the fallout with this as Maybelline eyeshadows tend to fall everywhere.

Apply this colour to be just over the top of the eye socket colour (the dark reddy brown) but not as far up as the eyebrow. Use the same eyeshadow brush to do this and also use the same technique go over it and over it until you are satisfied with the colour and the way it has blended with the dark brown.

Step Five: Line your lower lashes. I'm going to line the eye in eyeshadow rather than a kohl liner. Grab yourself a slanted eyeliner brush. I have used a slightly fluffier one than I usually do because I didn't want the line to be so solid, more smudgey. Line the eye in the same eyeshadow colour you did on your socket. Dont take this all the way to the inner eye, just taper the colour off after you have gone past the half way mark on your eye.

Step Six: Mascara. I have show the picture below to just how much better make up looks with mascara. I have used a dark brown here mainly because this is a day look, its also for work and I didn't want it to be to harsh.

Then you are done! I'm sorry that I don't have any step by step pictures to show you the steps this time! I have tried to take the pics at different angles so you can see the difference and which colours go where.

As always comments and questions welcome! God willing I can get some more time to devote to this blog..please continue to bear with me!


This picture is of the neutral base colour up to the brow bone, eye socket colour of the reddy brown and then the crease colour of the reddy purple you can also make up the lining of the lower lashes. See what I mean about how I didn't want a defined line?


This picture if just of a double view of what I have described above.


Here I am showing you the importance of mascara! See the difference between the eyes? If there is only 2 things you walk out of the house in during the working week mascara should be one of them!
The final both eyes with mascara, lower lases eyeliner and everything done then pop your glasses on and off you go to work!


Yours happily moving on to a new job whilst wearing glasses!

Jenn
xx

Monday, April 5, 2010

Classy, Coy and Curious Lady Like Look

Happy belated Easter and happy days to all of my friendly Classy, Coy and Curious followers!

Geez it has been a while (again) between posts for me and (again) I apologize. Life just seems to be getting in the way lately and I am also working very hard on a book and that has taken center stage for me in the spare time that I do have.

But alas! I am here now with a beautiful look that reminds me of Audrey Hepburn (who we all know I heart) I have also not used liquid (or gel eyeliner as in this case) for a long time and it did take me a while to get this one right so patience is a definite MUST before attempting this look, if you are not in a patient mood...step away, get a glass of wine and take a breath!

I have called this the Lady Like Look, now lets gets started!

See below for the products that I have used for this one, as usual I have started with a nice clean and moisturized face. I have also just done my concealer and base coat eyeshadow.

You will need: Short bristle slanted eyeliner brush, eyeshadow brush. I have used Revlon (the pink) Matte Eyeshadow and the tri coloured compact is Maybelline Expert Wear eyeshadow in Berriful, black mascara, liquid or gel eyeliner


Step One: Base Coat Of Eyeshadow:

I have used the Revlon pink colour here as it is a nice soft lady like pink. Cover the entire eyelid right up to the brow bone.


Step Two: Liquid Eyeliner.

I have the two pictures below just to show how I get my liquid/gel eyeliner into a straight line.
Now, not everyone agrees with this technique. This is because the delicate skin around the eye area should not be pulled to hard, rubbed to hard etc. I do this because this make it easier for me to get my straight line and I don't pull the skin to taut, just enough so that the skin is taut enough for me to draw on the liquid liner properly.

When it is your turn do this however you feel comfortable. I have used MAC gel liner here with my short bristle slanted brush. Gel liner is so easy to work with providing you have the correct brush because it glides on so easily. The only worry with it is that it's not as easy to clean up mistakes because it is oil based so water on a cotton bud is not going to do the trick, it needs to be make up remover.

The line that we are going for here is thin to fat. The thin part starts in the inner eye and gets fatter as you work towards the outer eye. I find it easier to start from the outer and work my way in, but do whatever feels comfortable to you. Don't open your eyes to wide until the eyeliner has dried.

Another tip for getting a nice line is to try and do this in one action. If you try and do short strokes you will end up with a jagged line.

As I said in the beginning, to get this right it takes patience and practice so absolutely if you are not completely happy with your line, take it off and start again.


Step Three: Highlight and Underline.

You will need your eyeshadow brush again for this. I have done a subtle highlight with the deep plum colour on the Mabelline compact. You will need to angle your eyeshadow brush so that you only use the top of it. Angle it so that it goes right into your socket and gently apply the colour.

Only do this after you are 100% sure that your liquid eyeliner is dry or you will end up with an awful mess!

I also chose to do this after I had done my eyeliner because in case of mistakes, I wont have to re- do everything, just the base coat of pink and the liquid eyeliner. If you feel like some eyeshadow has gotten into your liquid eyeliner, simply gently go over it again.

I have also underlined my lower lashes with the berry colour as well, just to give them a little depth and definition. Use either a small eyeshadow brush for this or a slanted tipped short bristle brush like the one I used for the gel liquid liner.


Step Four: Mascara.

The last and easiest step for today! A few coats of volumizing mascara and you are done!
I like to use mascara that helps your lashes to appear longer with this look because with such a thick line of liner on your upper lash line, your lashes can disappear.


After that you are done! A lovely lady like fit for any Classy, Coy and Curious ladies!

I hope you enjoy and as always any suggestions, questions and pictures of you trying any of these looks is appreciated!


Yours going to have a cup of tea in a beautiful china cup and saucer with a scone in lace gloves and a lady like hat!

Love Jenn
xx

Sunday, March 7, 2010

Another take on the Smoky Eye

Hello Lovely Classy, Coy and Curious ones!

I hope you have all been well and having a fabulous time! It has been a few weeks in between posts for me and I apologise very much, life has been busy!

I have had weddings, hens nights, boring work stuff and family outings to take care of but all is well for today I present you with a nice, easy different take on the Smoky Eye.

I have used a combination or grey, silver, bronze and purple all topped off with some divine individual lashes!

This is the brushes and colours that you are going to need, I have highlighted the colours I have used with a red X.

I have used the MAC C.R.E.A.M palette again for the main portion of eyeshadow, I have also a purple quad from Revlon (not sure of the name, I will look it up if anyone would like to know) a tri compact from Napoleon Perdis and Blush in smitten from Australis and lastly a kohl eyeliner in black from Australis.


I am also using some individual lashes just to vamp the lashes up a bit.


Brush wise (in order) you will need an eyeshadow brush, short haired slanted tipped eyeshadow brush and lastly a fluffy slanted eyeshadow brush


Step One: Base Colour and foundation.
Foundation, concealer and base eyeshadow all have been done here. I have used the eyeshadow base of Shroom by MAC all over the eye and right up to the brow bone. I don't tend to use a whole face of foundation because I have been blessed with relatively clear skin.
I use an Australis concealer for under my eyes and around my nose. If I have any red patches on my face I blend some concealer into them. I use Rimmel bronzer as my foundation and I think I use the colour Honey.


Step Two: Eyeliner for the upper eye.
You will need a soft eyeliner for this. I have used a kohl eyeliner from Australis in Black. The reason that I use Kohl is because it is very easy to blend and glides on the eye with minimal effort. To draw this line all the way along your upper lash line I start from the outer eye and work in.
Gently pull your eye taut and glide the eyeliner to your inner eye. It doesn't matter to much if the line is a little bit wobbly (mine is!) Be sure not to get a big blog of it in your inner eye.
If this happens soak a cotton bud in make up remover and gently remove it.
I have included a picture of both eyes with eyeliner below if you need a reference!


Step Three: Black eyeshadow.
Dip your eyeshadow brush into your black eyeshadow. Apply to the eye lid but don't go right into the inner eye, keep the colour darker at the outer eye and only take the colour to just above the crease. Sorry for the right eye picture! My left eye picture didn't work so well! See below also for a double eye picture of this


Step Four: Grey on black eyeshadow.
After you are happy with your black eyeshadow (try and make them as even as you can) it is time for grey! I have used the grey from the MAC C.R.E.AM palette here.

Put the grey colour from your inner corner out, blending into the black as you go. If you have to much grey on and your black has all but disappeared don't be afraid to put on a little more black on the outer eye. Just make sure that you don't over load your eye.


If you have to start again go for it! Make sure to blend properly here with your eyeshadow brush.


Step Five: Grey on Grey eyeshadow.
After I had applied the grey from the MAC compact I was not happy with the depth of colour so I also added some other grey from my Napoleon tri compact. Dip your eyeshadow brush (just use the same one) into the other grey colour and apply in exactly the same way. Work from the inner corner out, blending into the other grey and black eyeshadow.

The below is a great pic to see exactly what is going on and where I have put the colour.


Step Six: Purple on Grey.
After you have blended in your grey colours it is time to add some purple! This is a stunning colour to wear if you have blue eyes!
Using the same eyeshadow brush again dip it into the purple colour (I have put a red X in the colour I used) and apply all over the eyelid.
Make sure not to apply to much as we are still trying to keep some of the black and grey coming through. Take the purple colour right up to where the black and grey have finished and also don't be afraid to ;let it go to the inner eye. We are wanting a subtle purple hue.


Step Seven: Eyeshadow eyeliner and bronze.
Here I have lined the bottom lashes with the same black colour I used originally from the MAC palette. You will need your short haired slanted tipped brush for this. I have used eyeshadow rather than my kohl eyeliner due to eyeshadow staying place better and also giving a nicer line. I didn't want the liner to be so sharp, more of a smudge. Also I have added some bronze to the very inner corners using the same slanted tipped brush I used to do the eyeliner.

The reason I did this is just to lighten it up a little and this is also a great tip for blue eyes!


Step Eight: Mascara and Lashes.
Now that we are done with the eyeshadow part of this lovely look its time to really ramp it up!

Apply black mascara to your top and bottom lashes. Only do one coat because it is also time to apply your individual falsies! I have used 4 on each eye and have placed them on the outer half of the lash line. Dip the end of the lash into your glue and leave for 30 seconds before sticking them on.

This helps the glue to dry and little and make it easier for you to place them properly. Start from the very edge of your lash and work your way in.
Try and keep the space in between the lashes even but its no big deal if it isn't, just try and make it look natural. Once you have left them for 10 minutes or so apply another coat of black mascara to your top lashes and perhaps your bottom if you need to.

These pictures are great to see the placement of the lashes.


We are pretty much done! Apply a little blush to your cheek bones and then add some gloss and out the door! There may seem like a lot of steps to this look but all up this probably took me about half an hour including the lashes. I guess it is easy when you know what your doing BUT I think if you give it a go you will do great!

Apologies for the quality of the pictures on here, I am trying to figure out how to have higher mg pictures on here, if anyone knows please email me!

Your loving you all for reading this blog!

Jenn
xxx

Sunday, February 14, 2010

Catwalk to the street

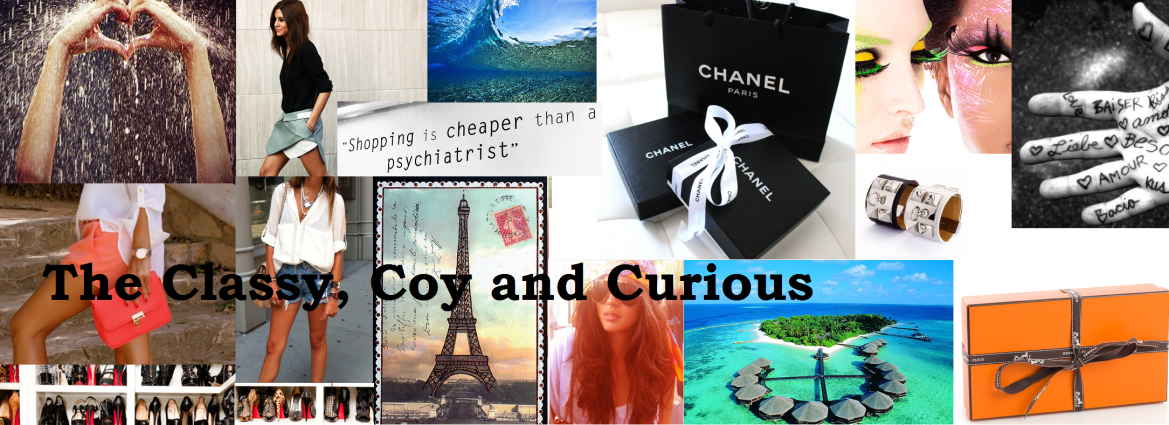
Hello Coy and Curious ones!

It has been a while between posts for me and I am very sorry! The beginning of this year has been filled with lots of busy bits and pieces!

I will get right to it!

I have come up with a wonderful idea that takes the most glamorous looks off the catwalk and takes them to the street. This is my very first one and I hope you like it.


See the model on the left. This lovely lady has very pale foundation and also powder foundation over the top I would say, yellow and black eyeshadow with a touch of green on top on the black. She also has some eyeliner on the outer and inner rim and of course blush. I call this look Day and Night!

Now I have just done the eyes in this post. Already applied are some concealer and a touch of bronzer all over the face.

What you will need:
Eyeshadow brush, short haired slanted eyeshadow brush, Black kohl eyeliner, I have used the colours from MAC C.R.E.A.M eyeshadow palate (I have put a small red cross on the colours used)


Step Two - Apply you're concealer and foundation as you normally would. If you like to use a primer please also apply this and blend it well and then we begin with a blank canvas!


Step Three- Apply black kohl eyeliner along the top lash line to define you're eyes. It doesn't matter if this is a little wobbly as we will be going over the top of this with black eyeshadow.


Step Four- Apply black eyeshadow to the outer corner of the eye. Stay away from the inner corner as we will be putting another colour there, if you slip up simply wipe it away with a tissue.

Try and keep the black colour to just over the eye socket bone as the picture shows, also try and keep this slightly curved and not a sharp line.

Do the other eye exactly the same, if you have any eyeshadow fall out under you're eye don't worry because we will fix this later.


Step Five- Get your yellow eyeshadow and apply it to the upper eye lid and apply to just cover the black colour and try and blend slightly so change of colour is not as drastic as the model's picture.

Fade the yellow into the inner rim, don't concentrate the colour to much there though as we are going to put another colour there.


Step Six- Apply the bronze colour quite heavily to the inner corner of the eye and fade it out to the black. Also grab you're slanted eye shadow brush and lightly line the bottom lashes in a smudgy line underneath the lashes and not on top.

This picture also helps to show the yellow on top of the black.
See the other picture to the side as well.


Once you are happy with the eyeshadow on both eyes, apply a few coats of black mascara to your top lashes and bottom lashes.


Step Seven- Time for the false lashes!

I have used individual short haired lashes. These are SO easy to apply. For this look I have just applied them to the outer lash area to give the natural lashes a bit of fullness.

Simply apply some glue to the end of the lash and apply evenly spaced to the outer area of the lash. I have used 4 on each eye. Once this has dried apply some more black mascara to them if you like. Also make sure they are curling with you're
normal lashes. The key is to make them look natural.

Step Eight- Dip your eyeshadow brush in the white glittery colour and highlight just under your eyebrow and dab a little on top of the bronze colour in you're inner eye.

Then you are DONE!

I hope you like it, send me a picture if you have tried this look!


Yours eternally grateful of you actually reading and look at my blog :-)

Jenn
xx